Showing posts with label final. Show all posts

Friday, October 22, 2010

UN Botanical Gardens Comp

So i was pumped to take photos for the Botanical Gardens Competition, however what I wanted to shoot were the windmills in Bungendore. (similar to when i took those photos for Sylvia's assignment last year).
I could not borrow a longer lens from CIT as it was borrowed out, and when i went to go shoot, they were way too tiny, so i did a couple landscape shots instead. this is what i came up with. i hope they somehow fit into any of the categories for the competition.


Wednesday, October 20, 2010

Wednesday, October 13, 2010

Sunday, September 26, 2010

More shoots...

Ok, been a couple weeks since last post, but i have been sitting in front of the computer for hours and hours!!!
Finally, i have finished pretty much every bottle, all 5 of them.

The following bottles i am having different opinions on which image i preferred. The actual bottle had the graphic design on the back of the bottle, but it distorted heavily when trying to photograph the front, with the design still perfect.
So i took off the design, perfected the bottle, and used the design as either a background, or have it on a low transparency behind the bottle's label, which it's supposed to be anyway. One of the bottles have been composed differently as well, a bit of an overlap between glass/bottle.

These photos arent quite finished, as the Gin bottle still needs more editing, (water ripple coming from underneath), and the Absolute bottle needs its label put back on.


Tuesday, September 14, 2010

Imaging 4, Artificial Elements

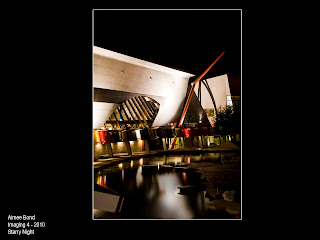
So for Kate's 2nd assignment we were asked to add artificial elements to a photograph that would suitable go with the image.
So the first one i did "stars". I added stars to the sky, but also in the reflection on the water.
The website i used for this was:
http://www.photoshopessentials.com/photo-effects/starry-sky/

The steps follow:
Add a new layer filled with black. Add noise to this image with Gaussian and Monochromatic turned on.
Create a Gaussian Blur with a very small radius.
Select the Sky, still on the noise layer by adding a layer mask, then adjust the levels, by bringing in A LOT of black, they grey and white is then adjusted to suit your needs.
Set this image to "screen".

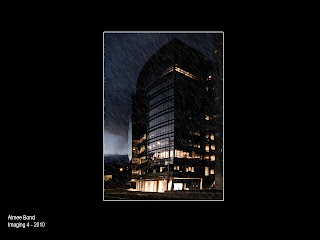
This image was helped by the aid of:
http://www.knowledgesutra.com/forums/topic/37180-how-to-make-cool-rain-effect/

Duplicating the base image, adjust the levels of the image to suit a dark, moody rainy night.
On a new WHITE layer, add some noise.
Create some motion blur on this image. Depending on the resolution of the image, it may need less or more.
Using the Levels tool, adjust the BLACKs, by adding a lot more. the grey and white are also slightly adjusted to have more depth.
Repeat the steps, and angle the Blur to a slightly less vertical position to create some "cross-hatching".

Absolute Raspberri

My 4th photograph for alcohol advertising. I am still going along clean, simple techniques, and using different elements in the photograph to pull together a convincing shot (for magazine use). This shoot was VERY difficult in the terms of timing. Of course the ice will melt under the modelling lights, which made it slightly difficult to position the lights to get the highlights etc. I also found it increasingly hard to photograph the ice, so it wasn't so "flat". when shooting i couldn't see the contours of the ice, jaggered bits at all. So this image is actually 3-4 images put together. I am yet to photoshop in the correct exposed label on the neck of the bottle. and the label needs some work, as i was chipping away at the ice, i noticed i was actually scrapping off the red label, which also took off the lettering in a lot of spots. Luckily... i have another bottle to photograph the label, and just stick in there which will be good. :).
I added a reflection to the images, as it was very "floaty" on the white background. I was however considering doing a different background entirely, by photographing a whole bunch of natural (unfrozen) berries, and have the bottle centered.... we will see how this goes first though.


Bottles left to photograph are SOUTH gin, and Absinth Fairy.

Wednesday, September 8, 2010

Kiwi revised.


So going with the thought "less is more" i revised the amount of kiwi in the shot. Removing the top right kiwi fruit as it was kind of heavy for the frame of the photograph, and it made it look as though the bottle was in a tank, (how the water comes from the top.)
So also removing some bubbles, and less clutter around the image, i came up with this:

Thursday, September 2, 2010

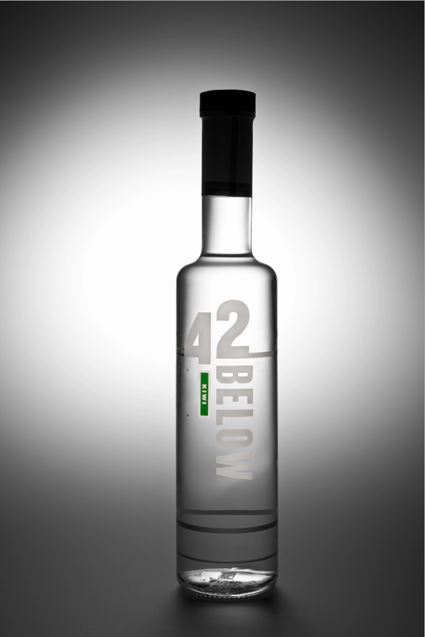
42 below - bottle

ok so below is my final edit of the 42 below - bottle only.
I included and "morphed" 2 bottles together, the first being the silhouetted bottle, and the 2nd being the label. Below is the Layer by layer process of my final photograph.
I have also cleaned up the bottle, as seen in 1st and 2nd image. on the bottle has engraved information on the back of the bottle, but as it is clear it is still very visible from the front, so i have edited it out. it looks so much more effective without the busy images coming from behind.
The Label took a lot of work as i had to overlay the correct exposure onto the silhouettedbottle. A lot of time was spent on the bottom labels as i had to erase all in between the lettering.
Im still not entirely happy with the bottom labels, potential more editing to come.


KIWI FRUIT BEING EDITED IN NOW ! :)
So this is something which i have put together......

more anjeo

Ok so using my standard "bottle" from the previous post, i replaced the bottles in the following photographs, these photos are the "honey dripping", and sticks, still waiting on the shot glass as editing takes so long! They still have a little more work needed, (esp on the bottom 2 photographs) around the honey. Im very much liking the honey dripping one....


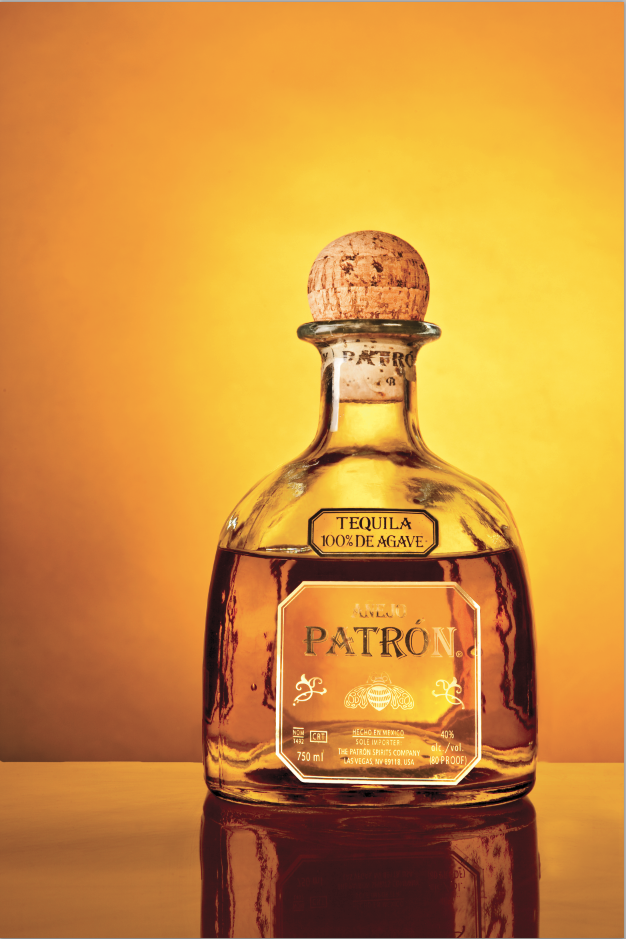
Anjeo Patron

So this is a work in progress collaboratively putting together 3-4 photographs, just for the bottle.
That doesn't include the extra elements going into the advertisement, which will be (not edited yet), honey dripping from honey sticks, honeycomb and shot glass on ice.
Looking through my boyfriend's ESPN magazines from the States, they do a lot of alcohol advertisement, and i feel that my final product would be perfect for their magazine.
So below are some screen shots of "the bottle", layer after layer.

This photograph is what i started with, So i used the cork from this shot.
This shot i used a silhouetted photo of the bottle, using the layer above, for the cork
This image is from a 3rd photograph and i used the label.
the fourth layer is for the lettering on the bottle, from yet another photograph.


Thursday, August 19, 2010

final proposal

This is my final portfolio for my time at CIT.
I will be producing a studio and a location portfolio specifically in the area of advertising/promotions.

Studio:
Producing 5 images i will produce quality images using glassware.
3 of these final photographs will be composite images. The object of focus will be top shelf spirit bottles, suitable for high end advertisement.
In total the final photograph will comprise of 3-4 edited images composed into one.
The other 2 final photographs will include technical skills with movement, lighting and composition.

Location:
This portfolio will be taken in the streets of Canberra, possibly Sydney.
I will locate a local fashion designer (NOT CIT FASHION STUDENT). I am after a designer who has a "collection" of garments, which can all tie in together. Or, alternatively garments which are all unique in their own way.
These pieces will be on mannequins in the streets, high busy areas will people bustling around. And then there is the rigid mannequin in the middle of it all.
I have access to mannequins, but i am after ones that can be more interactive with their arms, maybe ones bent as though sitting.
Depending on how i am travelling with this portfolio, i will "superimpose" a model's head on to the mannequin.
There will be 5 final images in total.